Best Practices for installing the Evo desktop client
Note: If you have already installed Evolution and are simply looking to fix the permissions issue, see the separate section below.
The Evolution payroll system by Asure Software provides a GUI desktop client for connecting to the mothership, but recent versions of the installer present challenges relating to file permissions around the frequent auto-updates when the payroll system is updated to a new version.
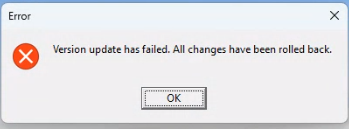
Evolution requires an administrator to install the software in the first place, which is common for many applications, but because of a bug in the installer these auto-updates will fail for non-administrative users, producing an error dialog along the lines of:
This post describes the best practices for installing the Evolution desktop client software on a Windows machine. It does require somebody with administrative credentials to perform this task, but the steps need only be applied once at installation, leaving Evolution ready for future auto-updates, including by different users on the same computer.
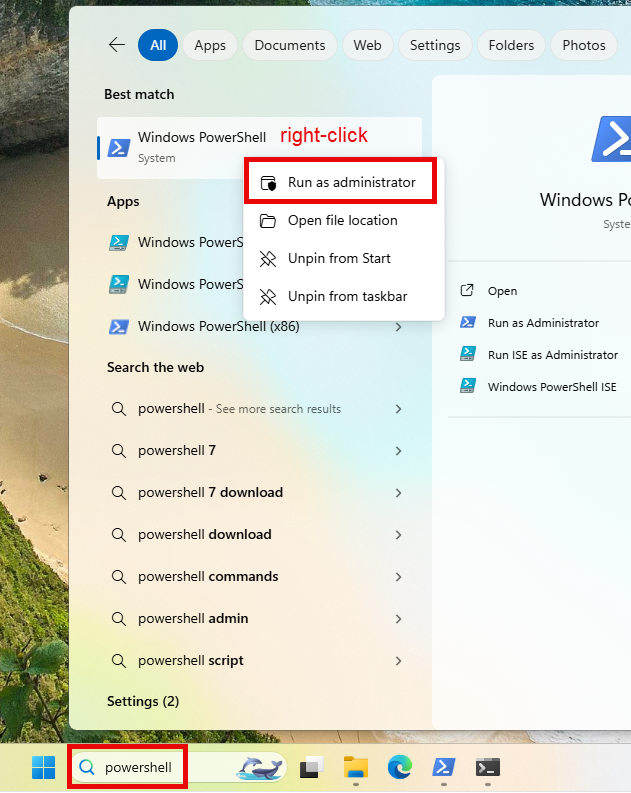
Create an elevated Administrative PowerShell session
This applies whether you're a non-administrative user and have to enter admin credentials, or if you are an administrator but still need to approve elevation to get the full admin token. This is normally done with a right-click on PowerShell + "Run as admin".
If you are a non-administrative user, you (or your IT person) will be prompted to enter credentials for an admin user, but even an admin user may be prompted for elevation:
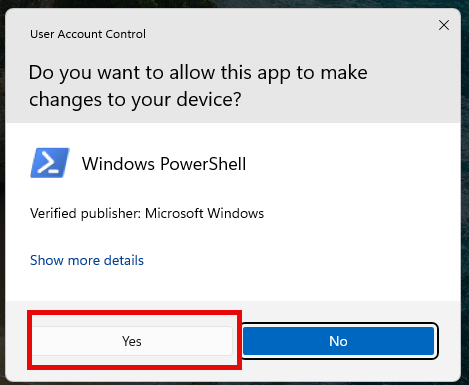 This console command window is normally dark and will have "Administrator" in the title bar.
Run the EvClient64 installer
We're going to describe an unusual procedure that we ourselves just learned, and it fits in nicely with all the steps to install this properly.
- In Windows File Explorer, find where the EvClient64 installer file is found, perhaps in the Downloads folder.
- Right-click + Copy on the .msi installer file
- In the elevated PowerShell window, Paste. This might be a right-click or the [INS] key. It will paste the full path of the installer file into the console session.
- Press [Enter] to launch the installer.
- Follow the installation prompts as usual.
- In the Destination Folder dialog, either navigate to the desired directory, or leave it as the default (usually C:\Program Files\Asure\Evolution\Client, though this default has changed several times over the last several years).Be sure to remember path where you just installed it - this will be needed shortly.
After installation has completed, we will return to the elevated PowerShell session and change to the directory where everything was installed using the cd command followed by the full path in double quotes.
The next step changes the permissions of the install area, allow all users the rights to modify it:
PS> cd "C:\Program Files\Asure\Evolution\Client\"

PS> icacls (get-location) /grant "BUILTIN\Users:(OI)(CI)M" /T
This will show each file modified, with a successful session looking like this:
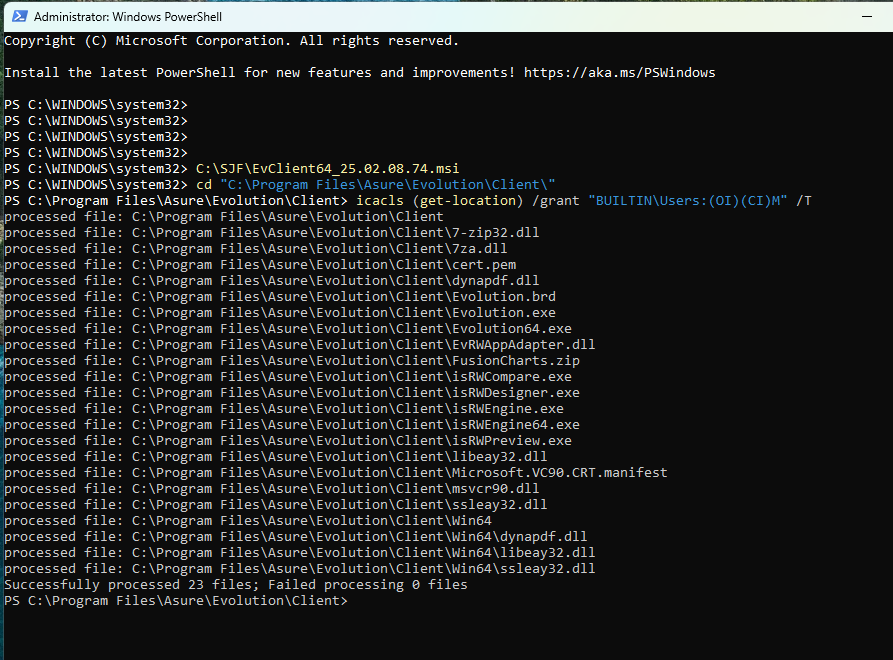
With this done, Evolution can now be launched by any user on the computer with auto-updates happening seamlessly.
Optional: move shortcuts
Unfortunately, the Evolution client installer puts the Evolution icons on the desktop of the administrative user and not the current user; many of us consider this a bug as well.
The fix is for an administrative user to move the shortcut - usually named "Evolution Client 64" - from the administrator's desktop to the public desktop shared by all users. This can be done from the administrative PowerShell as well:
We first find out the exact username of this administrative user, and in our example it's steveadmin, and change to that user's desktop directory:
PS> whoami
win11pro\steveadmin

PS> cd \users\steveadmin\Desktop

PS> mv "Evolution Client 64.lnk" C:\Users\Public\Desktop
This complete, Evolution is fully installed, with proper permissions for auto-update, plus the icon should be available for all users.
Type "exit" in the PowerShell console to close it.
Fixing a broken installation
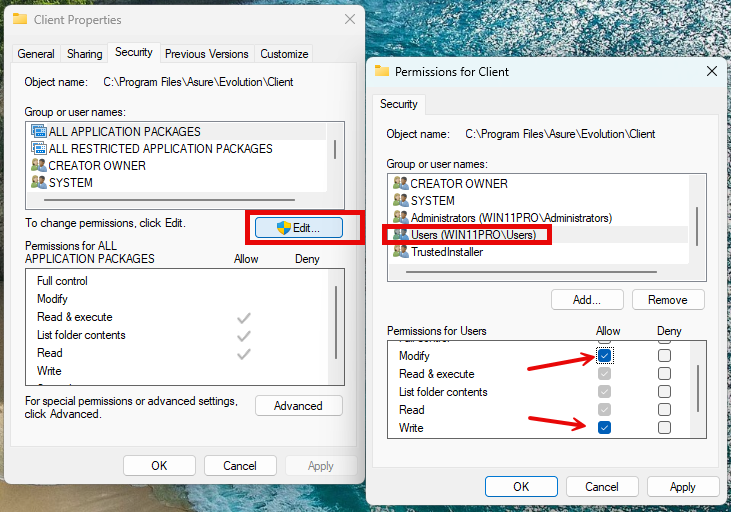
If Evolution had previously been installed but is not allowing an auto-update, there's a bit of a shortcut for the IT staff to just modify the permissions on the Client folder directly in the File Manager, saving the trouble of all the PowerShell.
- Login to the computer as a full Administrator
- Navigate to the parent of where Evolution is installed, usually C:\Program Files\Asure\Evolution
- Right-click on the Client Folder, select Properties
- Click the Security tab
- Click the upper [Edit] button. It may prompt for elevation
- Click the Users group to select it
- In the lower panel, click the [X] Modify checkbox, which will probably also select [X] Write
- Close all the dialogs
The security dialogs ought to look something like this: